

In a world that’s becoming increasingly eco-conscious, the power of harnessing sunshine for sustainable living cannot be overstated. Building your own solar dryer is a practical and rewarding step towards energy efficiency. This comprehensive guide will walk you through the process, from understanding the basics to constructing your solar dryer.
Contents
Why Go Solar?
Solar Energy: A Clean Alternative
In the pursuit of cleaner energy sources, solar power takes center stage. Unlike fossil fuels, solar energy is abundant, renewable, and doesn’t produce harmful emissions. By opting for solar, you not only reduce your carbon footprint but also contribute to a greener future.
Cost-Effectiveness
Investing in a solar dryer might seem daunting at first, but the long-term savings are substantial. Once your solar dryer is up and running, the energy source is free, and your utility bills will see a noticeable drop. It’s an investment that pays for itself over time.
Understanding Solar Drying
How Solar Dryer Work
Harnessing Photovoltaic Power
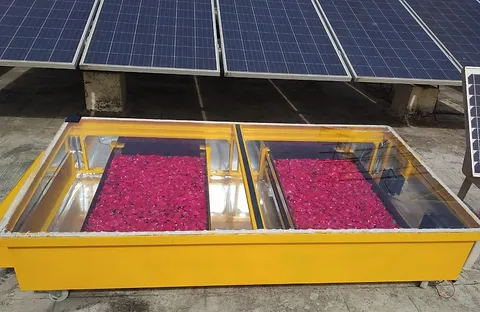
Solar dryer rely on photovoltaic cells to convert sunlight into electricity. This energy powers the dryer, providing a sustainable solution for drying various items, from clothes to fruits and vegetables.
Maximizing Efficiency with Reflectors
To enhance efficiency, consider incorporating reflectors into your solar dryer design. Reflectors bounce sunlight onto the drying surface, ensuring optimal exposure and speeding up the drying process.
Building Your Solar Dryer
Design Considerations
Choosing the Right Location
Start by selecting an ideal location for your solar dryer. It should receive maximum sunlight throughout the day. South-facing locations are generally preferred for optimal exposure.
Materials Needed
Constructing a solar dryer doesn’t require fancy materials. Gather essentials such as solar panels, reflective surfaces, a drying rack, and a frame to support the entire structure. Ensure that the materials are durable and can withstand outdoor conditions.
Step-by-Step Construction Guide
Assembling the Frame
Begin by assembling the frame of your solar dryer. This serves as the skeleton that supports the other components. Make sure it’s sturdy and positioned at the chosen location.
Installing Reflectors
Attach reflective surfaces or mirrors to amplify sunlight exposure. This step maximizes the efficiency of your solar dryer, ensuring that every ray of sunshine is utilized.
Integrating Solar Panels
Connect solar panels to the frame, positioning them to capture the maximum sunlight possible. This is the heart of your solar dryer, converting sunlight into the energy needed for the drying process.
Incorporating the Drying Rack
Finally, add the drying rack to the frame. Ensure it’s well-ventilated to allow proper airflow, facilitating an even and efficient drying process.
Maintenance and Troubleshooting
Routine Checks
Regularly inspect your solar dryer to ensure all components are functioning optimally. Clean the solar panels and reflective surfaces to maximize sunlight absorption.
Troubleshooting Tips
If your solar dryer isn’t performing as expected, check for obstructions in sunlight, faulty wiring, or debris accumulation. Addressing these issues promptly will maintain the efficiency of your solar dryer.
Conclusion
Building your own solar dryer is a tangible way to embrace sustainable living and reduce dependency on conventional energy sources. By following this ultimate guide, you’ve taken a significant step towards harnessing sunshine for a greener, more eco-friendly future.
